
We are pleased to announce that GoldenGate Container images for commercial customers are now available on the Oracle Container Registry (OCR).
This release is an important milestone: it provides customers with quarterly, production-ready GoldenGate builds that can be easily deployed in modern containerizedenvironments. No more manual packaging or custom builds, just pull, run, and replicate.
This blog guides you through the process of easily provisioning GoldenGate in a container environment, enabling you to get up and running in just a few minutes as a customer.
In this post, I’ll walk through:
- Accepting the license agreement
- Generating an authentication token
- Logging into the Oracle Container Registry
- Pulling the GoldenGate container image
- Running GoldenGate inside a container
- Advanced usage for real-world deployments
- Retrieving the autogenerated admin password
- Logging into ServiceManager and verifying access
- Changing the admin password
1. Accept the License Agreement
Before you can use any GoldenGate image, you must accept Oracle’s license terms. This is a one-time step per image family and must be completed first.
Steps:
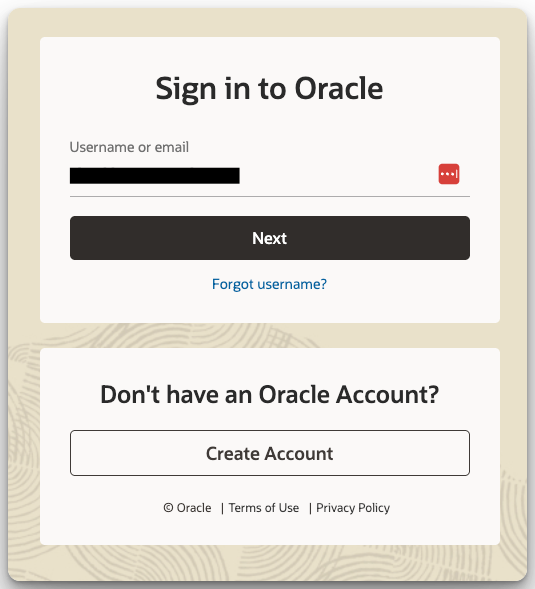
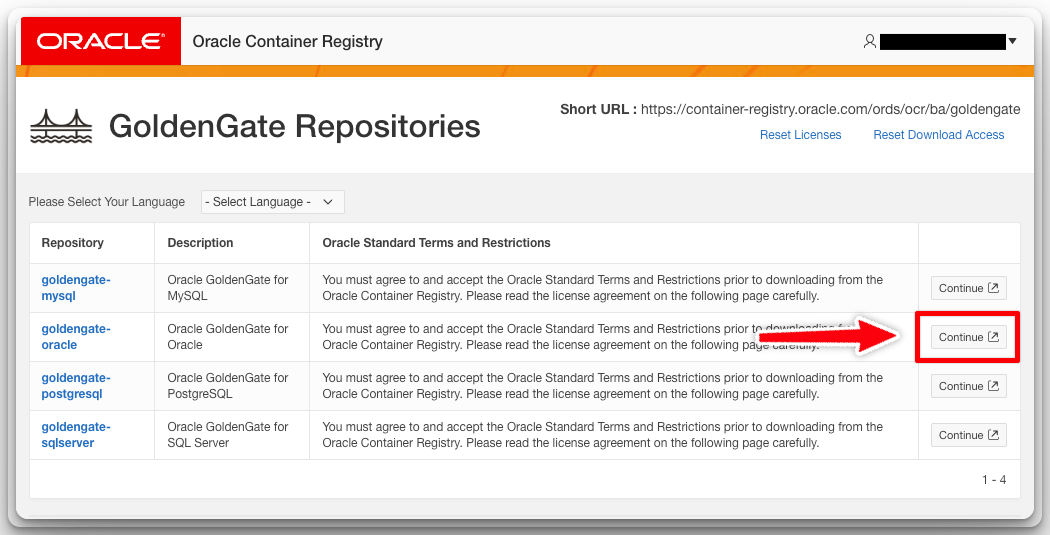
- Open Oracle Container Registry in your browser.
- Sign in and Navigate to GoldenGate.
- Select the GoldenGate image version you want (for example, goldengate-oracle).
- Review and click Accept to confirm the license terms.


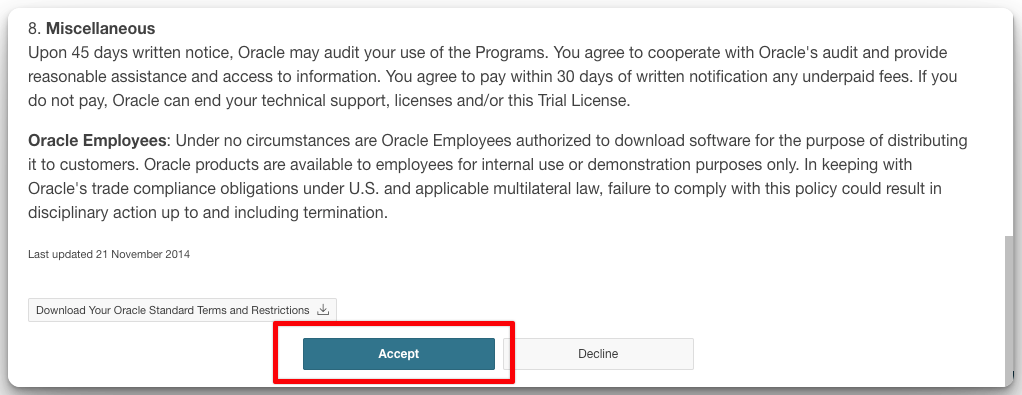
Without this step, any attempt to pull the image will fail.
2. Generate an Authentication Token
Docker requires credentials to log in to OCR. Instead of using your Oracle.com password, the recommended approach is to create an Auth Token in your Oracle account.
Steps:
- Open Oracle Container Registry in your browser.
- Sign in with your Oracle.com account.
- Navigate to My Profile → Auth Tokens.
- Click Generate Secret Key and copy the generated string.

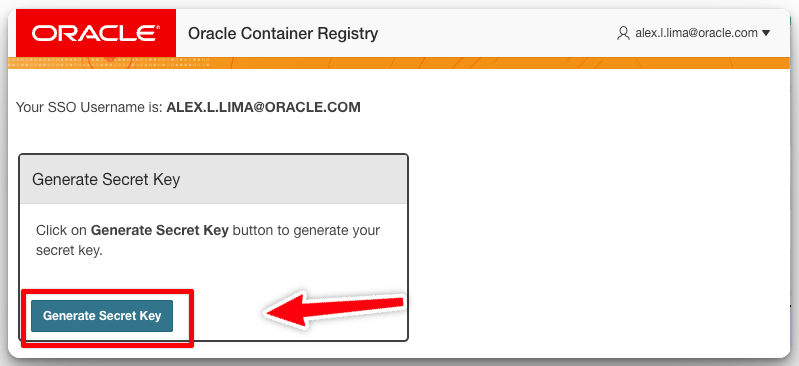
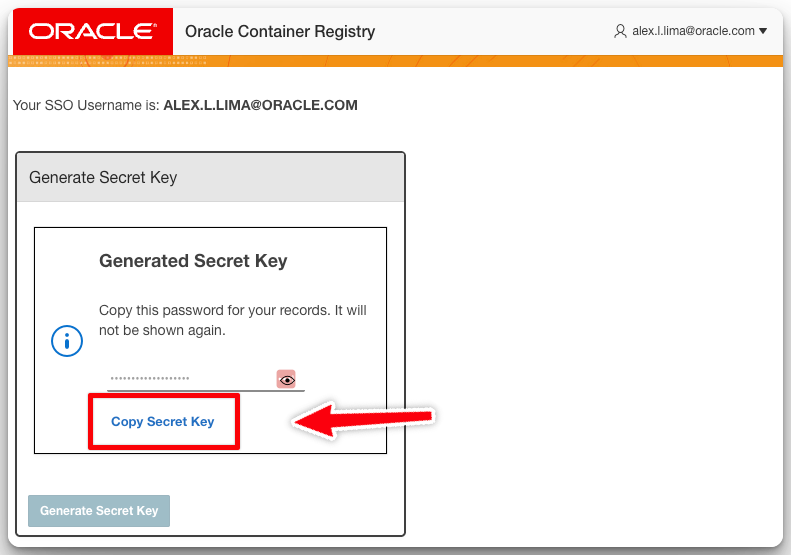
This token will be used as your password in the Docker login command in the next step. Keep it safe.
3. Login to the Oracle Container Registry
Now that you have an Auth Token, log in securely using the –password-stdin option:
echo '<auth-token>' | docker login container-registry.oracle.com -u "<your-email>" --password-stdin
- Replace <auth-token> with the token you generated in Step 2.
- Replace <your-email> with your Oracle.com account email.
If successful, you’ll see:
Login Succeeded
4. Pull the GoldenGate Container Image
Now you’re ready to download the GoldenGate image.
docker pull container-registry.oracle.com/goldengate/goldengate-oracle:23.9 && \
docker tag container-registry.oracle.com/goldengate/goldengate-oracle:23.9 \
           container-registry.oracle.com/goldengate/goldengate-oracle:latest
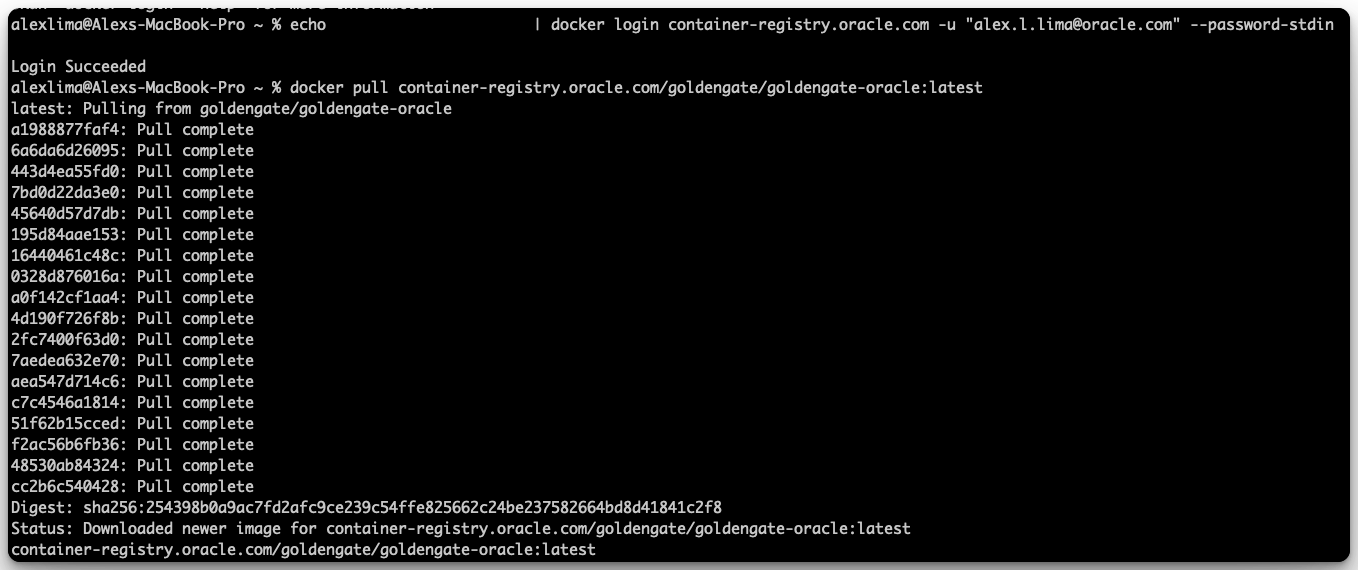
This fetches the latest GoldenGate image from OCR and stores it locally on your system.
5. Run GoldenGate Inside a Container
With the image available locally, you can start GoldenGate inside a container:
docker run -d --platform=linux/amd64 \
  --name ogg23ai \
  -p 9011:9011 -p 9012:9012 \
  container-registry.oracle.com/goldengate/goldengate-oracle:latest
Explanation:
- -d runs in background mode
- –platform=linux/amd64 ensures correct architecture (important on Apple Silicon and non-x86 systems), remove if not needed.
- –name ogg23ai assigns a container name
- -p maps ServiceManager and Deployment REST API ports
6. Advanced Usage
Persisting Data with Volumes
docker run -d --platform=linux/amd64 \
  --name ogg23ai \
  -p 9011:9011 -p 9012:9012 \
  -v /ogg/deployments:/u02/Deployment \
  -v /ogg/trails:/u02/trails \
  -v /ogg/logs:/u02/logs \
  container-registry.oracle.com/goldengate/goldengate-oracle:latest
Using Environment Variables
docker run -d --platform=linux/amd64 \
  --name ogg23ai \
  -e OGG_DEPLOYMENT_NAME=WEST \
  -e OGG_ADMIN_USERNAME=oggadmin \
  -e OGG_ADMIN_PASSWORD=welcome1 \
  -p 9011:9011 -p 9012:9012 \
  container-registry.oracle.com/goldengate/goldengate-oracle:latest
Docker Compose
services:
  goldengate:
    image: container-registry.oracle.com/goldengate/goldengate-oracle:latest
    platform: linux/amd64
    container_name: ogg23ai
    ports:
      - "9011:9011"   # ServiceManager
      - "9012:9012"   # Deployment port (example)
    environment:
      # Optional bootstrap values; you can omit or change as needed
      OGG_DEPLOYMENT_NAME: "WEST"
      OGG_ADMIN_USERNAME: "oggadmin"
      # If omitted, container will generate a strong password and print it to logs
      # OGG_ADMIN_PASSWORD: "MyTempPassw0rd!"
    volumes:
      # Persist config, trails, and logs on the host
      - ./ogg/deployments:/u02/Deployment
      - ./ogg/trails:/u02/trails
      - ./ogg/logs:/u02/logs
    restart: unless-stopped
    healthcheck:
      test: ["CMD", "curl", "-fsS", "http://localhost:9011/services/v2/health"]  # ServiceManager health
      interval: 15s
      timeout: 5s
      retries: 20
Bring it up:
# Start in the background
docker compose up -d

# Follow logs until you see the autogenerated admin password (if not preset)
docker compose logs -f ogg23ai
Kubernetes Deployment
## pvc.yaml

apiVersion: v1
kind: PersistentVolumeClaim
metadata:
  name: ogg-pvc
  namespace: ogg
spec:
  accessModes: ["ReadWriteOnce"]      # Use ReadWriteMany if on NAS
  resources:
    requests:
      storage: 100Gi
  storageClassName: standard          # change to your StorageClass

## pod.yaml

apiVersion: v1
kind: Pod
metadata:
  name: ogg23ai
  namespace: ogg
spec:
  containers:
    - name: ogg23ai
      image: container-registry.oracle.com/goldengate/goldengate-oracle:latest
      ports:
        - containerPort: 9011
        - containerPort: 9012
      volumeMounts:
        - name: ogg-data
          mountPath: /u02              # GoldenGate data root
  volumes:
    - name: ogg-data
      persistentVolumeClaim:
        claimName: ogg-pvc
Create and Run:
kubectl create namespace ogg
kubectl apply -f pvc.yaml
kubectl apply -f pod.yaml
7. Retrieve the Autogenerated Admin Password
On first startup, the GoldenGate container generates an administrative password for the oggadmin user. To view it:
docker logs ogg23ai 2>&1 | grep "Password for OGG administrative user 'oggadmin' is" -m 1
To capture just the password into a variable:
line=$(docker logs ogg23ai 2>&1 | grep "Password for OGG administrative user 'oggadmin' is" -m 1)
admin_pass=$(echo "$line" | awk -F" is " '{print $2}' | tr -d '\r')
8. Log into ServiceManager and Verify Access
Browser UI
Open the ServiceManager in your browser and log in:
http://localhost:9011
Username: oggadmin
Password: <value from Step 7>

REST API Check
Verify ServiceManager is running with:
curl -s -u "oggadmin:${admin_pass}" \
  http://localhost:9011/services/v2/deployments | jq .
9. Change the Admin Password
For security, change the autogenerated oggadmin password immediately.
UI method
- Log in to ServiceManager at http://localhost:9011
- Go to Administration → Security → Users
- Select oggadmin and set a new password
REST method
curl -X PUT \
  -u "oggadmin:${admin_pass}" \
  -H "Content-Type: application/json" \
  -d '{"oldPassword": "'"${admin_pass}"'", "newPassword": "MyStrongerPassw0rd!"}' \
  http://localhost:9011/services/v2/security/users/oggadmin/password
Replace MyStrongerPassw0rd! with your desired secure password.
Conclusion
With GoldenGate commercial images now available on OCR, customers benefit from:
- Simplified container deployments
- Quarterly, production-ready updates
- Persistent storage options for trails and configs
- Secure, configurable admin credentials
- Full alignment with cloud-native and DevOps practices
Start today: https://container-registry.oracle.com/

Leave a comment